Sidequest: Repairing a Symmetricom SA22c Rubidium Oscillator
Published on
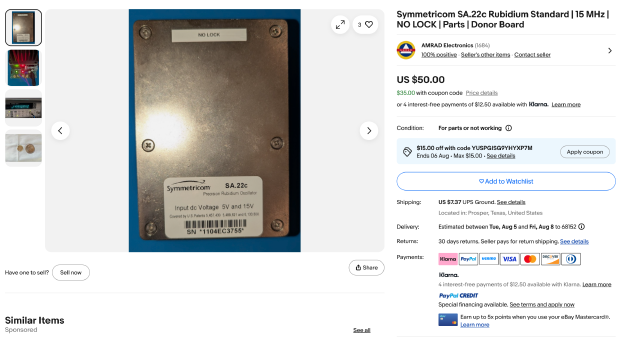
So I was browsing eBay late at night the other day and came across this $50 + shipping rubidium oscillator:
Per the seller, the unit did not lock, and in the last picture you can see why:
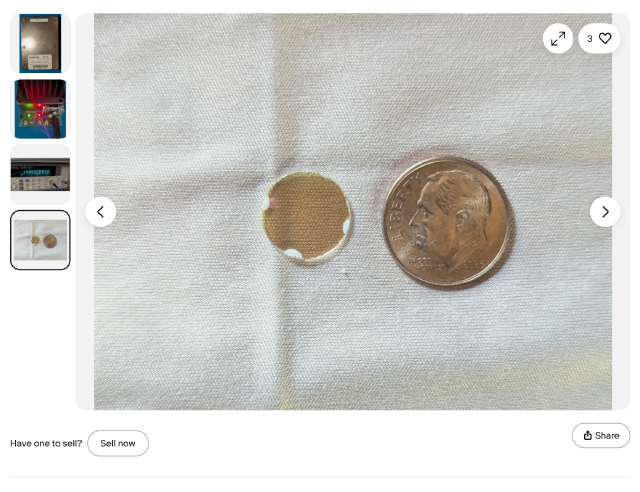
Doh! The dichroic lens fell off. It’s actually a filter for the light coming out of the rubidium lamp internally. This is a critical part of the oscillator - without it, the oscillator will not lock. In this case with no filter, all of the atoms transition to a higher energy state (C), rather than just A or B. My friend Pat made a great video on how rubidium oscillators work if you want to learn more: https://www.youtube.com/watch?v=CTWfhlLrIik
So needless to say this lens needs to go back on the unit. Thankfully I had actually done this before. One of the three units I got a while back actually had the same issue, and I was able to repair it as well using this same method.
This is probably the point where I should say to absolutely not try this at home. Rubidium, specifically Rb-87 in this case, is slightly radioactive with beta decay. While it won’t cause a nuclear meltdown, it can absolutely fuck you up if you are not careful. So live vicariously through me and don’t crack open radioactive clocks at home.
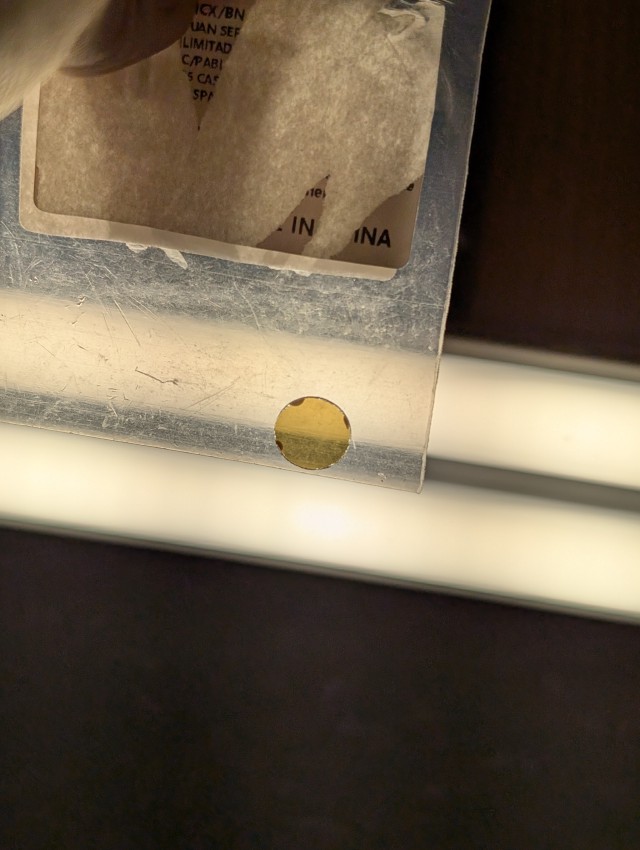
After I ordered it, the oscillator arrived a few days later, and the lens was packed as requested:
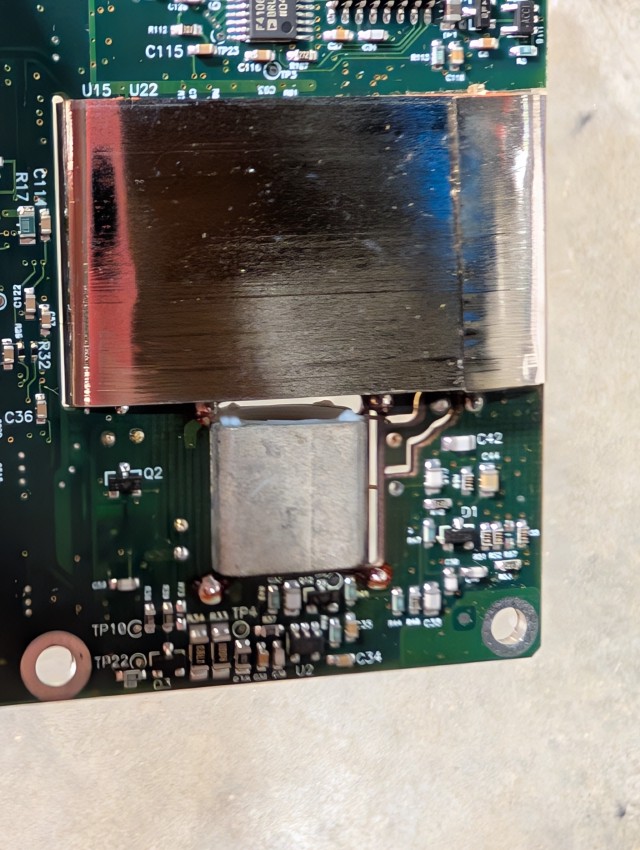
So the first thing I did was disassemble the oscillator and isolate the circuit board. The metal box at the bottom is the lamp, and where the lens should go (you can actually see the white epoxy marks on it from where the lens broke off):
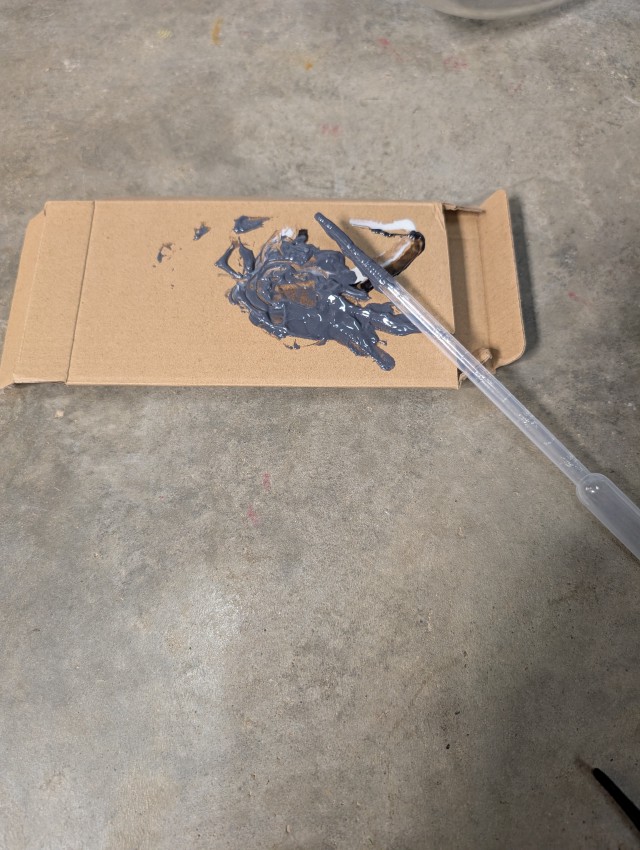
In the first oscillator repair I did, I chose to use JB-Weld High Heat. I didn’t have a specific reason for chosing it, but I was looking for a high heat epoxy, and that was the first thing I found at the hardware store. It doesn’t need to withstand a hot engine bay, but the lamp assembly definitely heats up, and I didn’t want it degrading over time. I had a tube left over from the last repair I did, so I just reused it. I squeezed a bit of the 2-part mix out on to some scrap cardboard and mixed it with a pipette.
Then I placed the lens back over the lamp and applied some of the epoxy mix. I actually found it was a bit easier to apply the epoxy after it had gotten a bit tacky (having been mixed for maybe 3 minutes or so) and using a thin flat applicator like a popsicle stick.
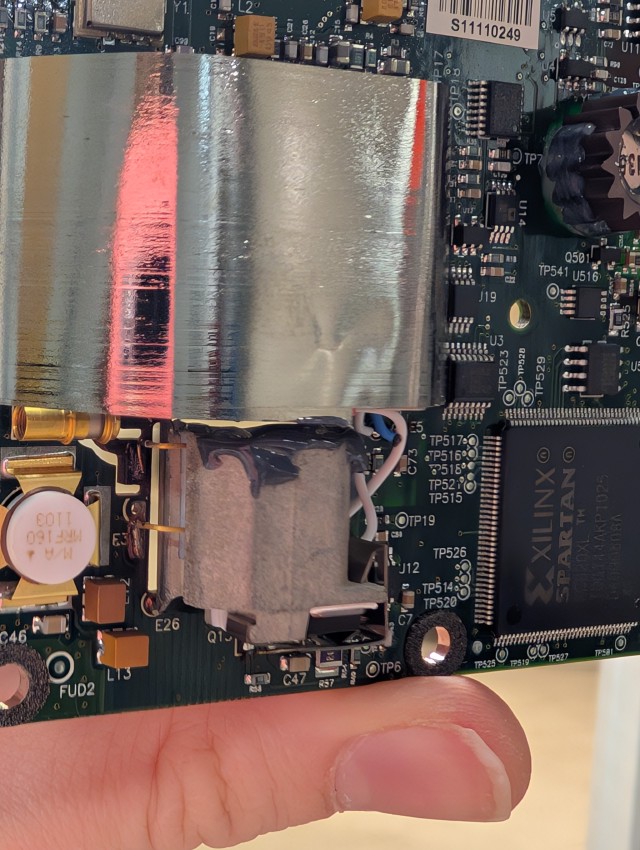
(don’t worry, I cleaned up the excess before it dried. I promise.)
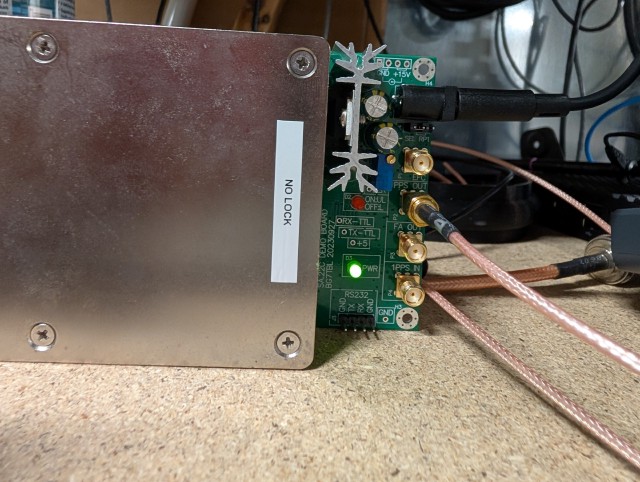
With the new epoxy applied, all I needed to do was let it cure. The instructions say it sets in an hour and cures in 24, but this can be accelerated by heat. I carefully assembled the clock back, keeping the lamp upright so that the lens didn’t fall off. I left it sitting in the case upright but not fully assembled for about an hour, just to increase airflow to hopefully kickstart the setting of the epoxy. Then, I plugged in the oscillator to get it warm and speed up the curing process. After waiting a few minutes, the unlocked light had gone out, indicating the “NO LOCK” label was no longer relevant:
I let it settle in for about 4 hours and strangely it’s actually performing better than the other unit I had running. Standard deviation on the PPS line between my BG7TBL GPSDO and the repaired oscillator was at about 600ns, while my other unit I had running was closer to 3us.
For a $50 rubidium oscillator I can’t complain too much. I’m very happy with the repair, and now I have another oscillator. But as the saying goes,
A woman with an atomic clock knows what time it is. A woman with two atomic clocks is never sure.