Raspberry Pi FET Hat
Published on
I had some of these stack lights laying around from a previous project that didn’t pan out:
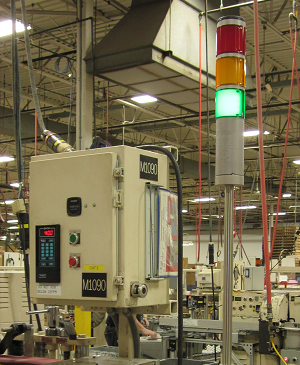
(Ktm250-1150gs - CC BY-SA 3.0)
I had the bright (hah) idea of hooking it up to my Prusa 3D printer to indicate basic status (warming, ready, printing, etc). But alas, I don’t have any outputs on the logic board, and my Raspberry Pi running Octoprint for the printer has no way to drive 24v outputs. Simultaneously, I was trying to find a way to power said Octoprint Pi off of the printer power supply rather than needing a separate 5v power brick. So, my latest random PCB project was born: I wanted to kill both birds with one stone, and have a 24v to 5v regulator plus some mosfets on one board.
For this one, I was curious, and timed myself. I managed to go from concept to having an ordered board in under 3 hours, which is pretty neat, considering I have zero formal training in elctronics and spent about 30 minutes looking at fans and connectors alone. The schematic is incredibly simple, just a set of 4 MOSFETs with (in)appropriate gate and pulldown resistors (we will get to that later), a TPS54302 and accompanying supporting components, and some connectors. I also added a cutout and power header for a fan in case the Pi needs to keep cool (which I haven’t tested much, the heatsink isn’t super hot at idle; and Octoprint barely puts a load on it).
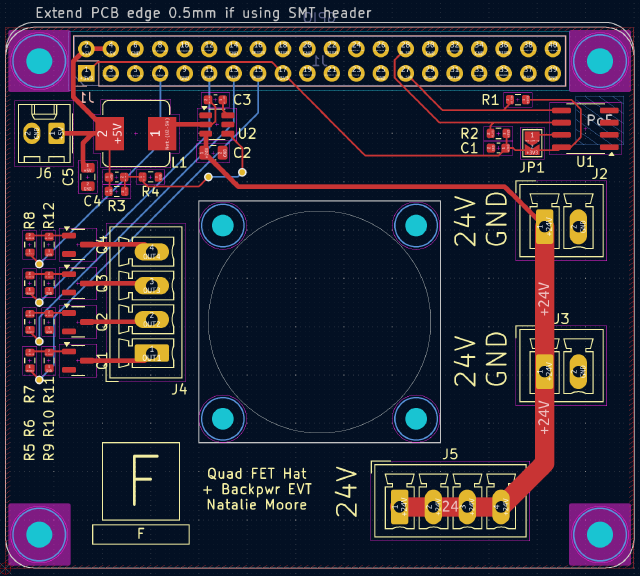
Another 30 minutes putting together the BOM, and I exported the gerbers, BOM, and PnP files, and sent them off to get made. A couple weeks and some back and forth with the PCB house later, I had the boards in hand:
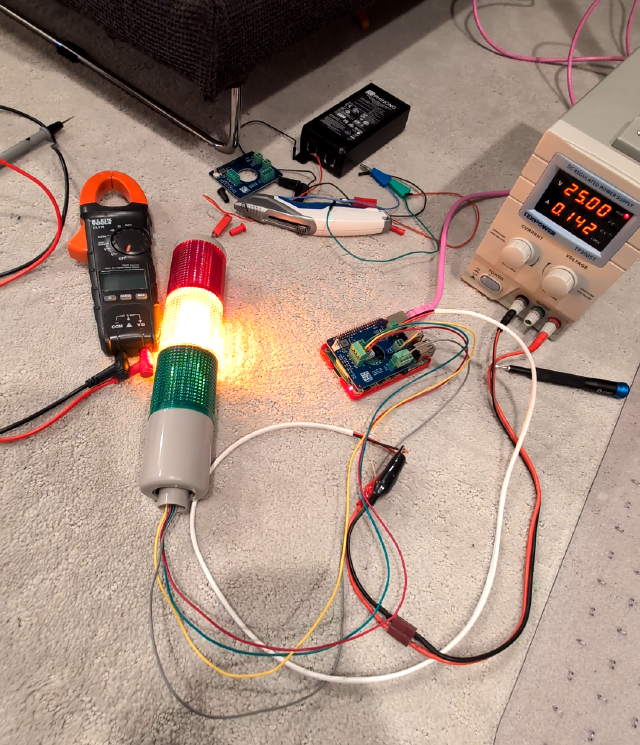
The boards came out nicely, and after testing the 5v regulator it did work, which was great. What was less great is the MOSFETs didn’t actually work to turn on the stack light. After some debugging I realized my error:
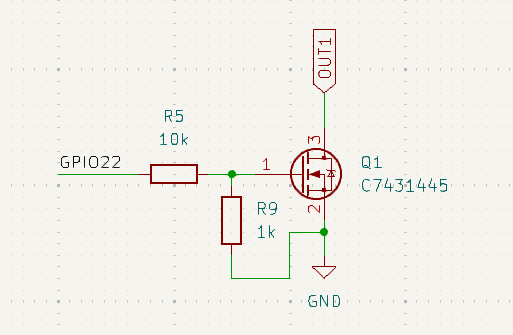
No wonder the gate voltage on the FET was only ~0.45v. I grabbed my hot air station and swapped the two resistors, and sure enough it lit up. That seemed to be the only issue though - power held steady when being drawn on by a RPi. I put it all together, and not only was the Pi powered with no issue from the printer’s 24V supply, but I also was able to cycle the stack light via a simple script to toggle the GPIOs on the Pi. All was well, and I put it back together on the printer.

I then spent the next day and a half working on a plugin for Octoprint that would update the light with the status of the printer (since nothing like that exists already apparently). And it works now! I have it set so that blinking green is ready/warm, solid green is printing, blinking orange is paused, and blinking red is an error of some sort (printhead crash detect, lost communication, etc).
Overall I was quite happy with the result, though I don’t feel it’s as useful as the serial hat I made a while back. That said I don’t regret making it at all. The plugin for Octoprint was probably the hardest, as I’ve never worked with Octoprint or plugins before. All in all though, it was meant to be silly, since most people don’t really need a stack light on their printer to indicate its status.